【ML-Agents Release 17 環境構築 2021.5 -Windows】【強化学習でAIを避難させる】 #2 -Unity ML-Agents - Qiita
上記urlを参考に ML-Agents Release19 + unity 2021.3 + python3.8 の環境を作成します。
※ 2022/9時点で、最新のpythonは3.10ですが、 mlagents-learn が動作しなかった為、python 3.8を使用しています
※ 今回は参考にしていませんが、以下のようなyoutubeもあるようです
目次
- 0. install anaconda for win
- 1. ml-agents release 19 branch を download
- 2. anacondaの仮想環境 作成
- 3. pip install mlagents & pytorch
- 4. install mlagents to unity
- 5-1. 学習の準備
- 5-2. 学習実行
- 5-2. tensorboard による学習結果確認
0. install anaconda for win
phttps://www.anaconda.com/ から、インストーラでである Anaconda3-2022.05-Windows-x86_64.exe をダウンロード & 実行
1. ml-agents release 19 branch を download
https://github.com/Unity-Technologies/ml-agents/tree/release_19_branch
から、ml-agents-release_19_branch.zip をダウンロードし、 c:/Users/end0t/tmp/ml-agents_19 として解凍。

ちなみに、「git clone」コマンドで、同様のことを行う場合、以下のようです。
$ git clone --branch release_19 https://github.com/Unity-Technologies/ml-agents.git
2. anacondaの仮想環境 作成
Anaconda Prompt から、以下を実行
(base) C:\Users\end0t> conda create --name ml_agents19 python=3.8.13 anaconda
(base) C:\Users\end0t> activate ml_agents19
3. pip install mlagents & pytorch
(ml_agents19) C:\Users\end0t> cd tmp\ml-agents_19\ml-agents-envs
(ml_agents19) C:\Users\end0t\tmp\ml-agents_19\ml-agents-envs> pip install -e .
(ml_agents19) C:\Users\end0t\tmp\ml-agents_19\ml-agents-envs> cd ..\ml-agents
(ml_agents19) C:\Users\end0t\tmp\ml-agents_19\ml-agents> pip install -e .
Anaconda Prompt から上記を実行し、その後、 以下のpip freeze コマンドで、installされたことを確認
(ml_agents19) C:\Users\end0t\tmp\ml-agents_19\ml-agents>pip freeze
   :
# Editable install with no version control (mlagents==0.28.0)
-e c:\users\end0t\tmp\ml-agents_19\ml-agents
# Editable install with no version control (mlagents-envs==0.28.0)
-e c:\users\end0t\tmp\ml-agents_19\ml-agents-envs
次に、以下でPyTorchをinstall
(ml_agents19) C:\Users\end0t\tmp\ml-agents_19>
  pip install torch==1.9.1 -f https://download.pytorch.org/whl/torch_stable.html
4. install mlagents to unity
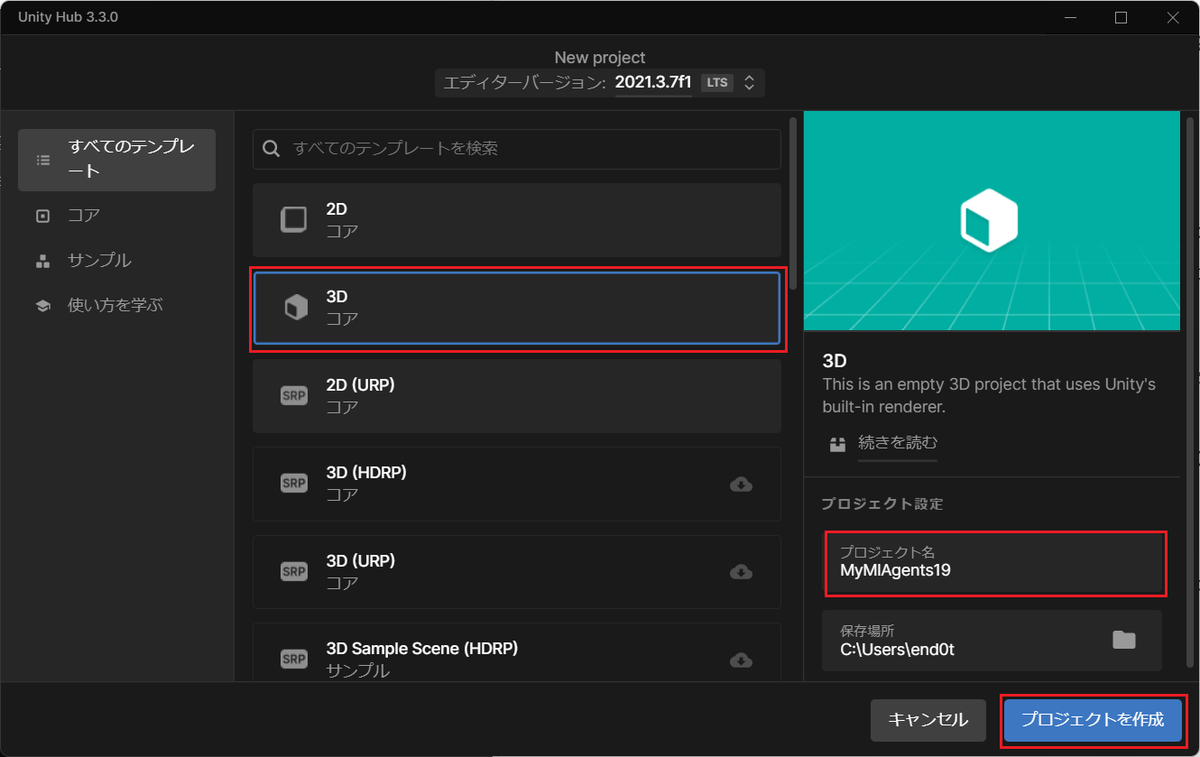
unity hub から 3dプロジェクトを作成
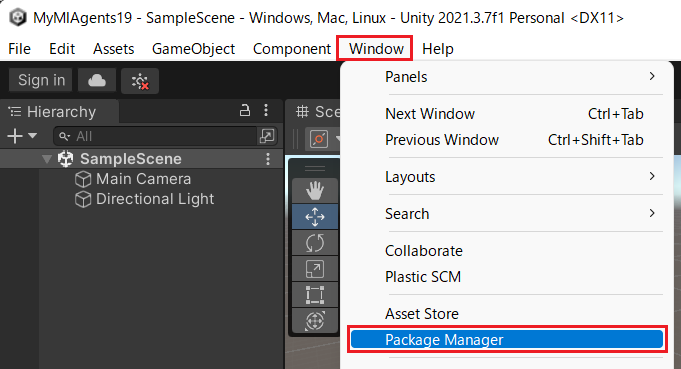
「menuバー → window → package manager」から 「+ → add package from disk」を選択し、file選択ダイアログを表示
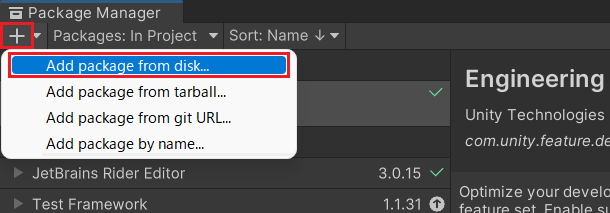
表示されたfile選択ダイアログへ、以下の2つを指定し、install
- C:\Users\end0t\tmp\ml-agents_19\com.unity.ml-agents\package.json
- C:\Users\end0t\tmp\ml-agents_19\com.unity.ml-agents.extensionss\package.json
以下は、インストール後のpackage manager画面

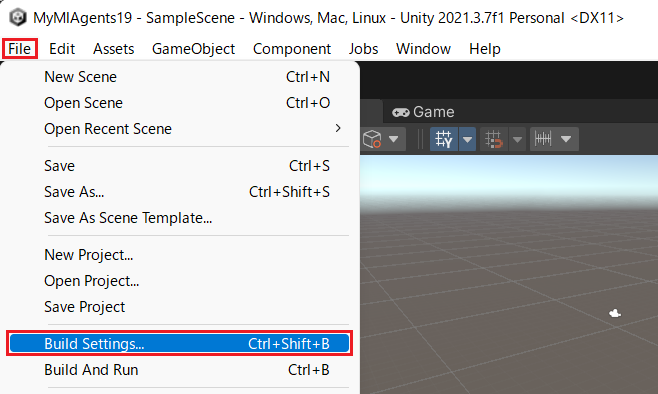
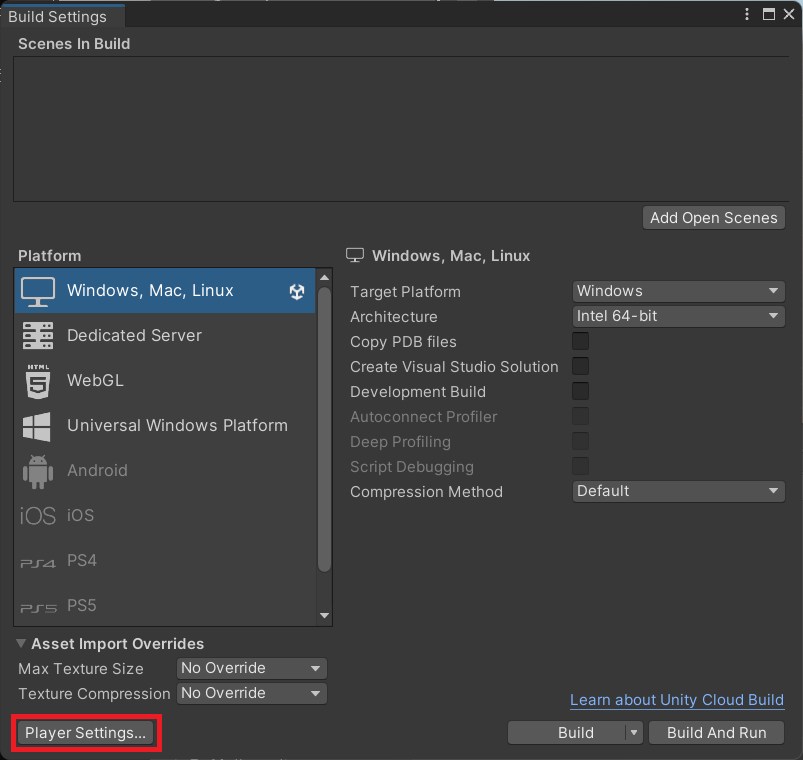
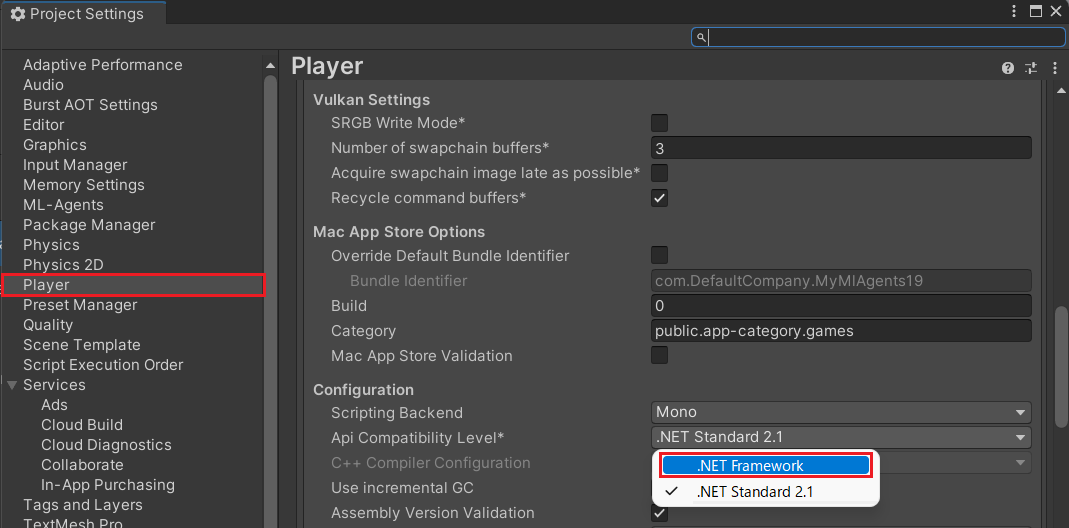
「menuバー → file → build settings」を選択し、 更に「player settings」から「api compatibility level=.net fwamework」を設定。
※ 参考にさせて頂いた 【ML-Agents Release 17 環境構築 2021.5 -Windows】【強化学習でAIを避難させる】 #2 -Unity ML-Agents - Qiitaでは 「api compatibility level=.net 4.x」となっていましたが、 私の環境である win11では「.net 4.x」が表示されませんでした
5-1. 学習の準備
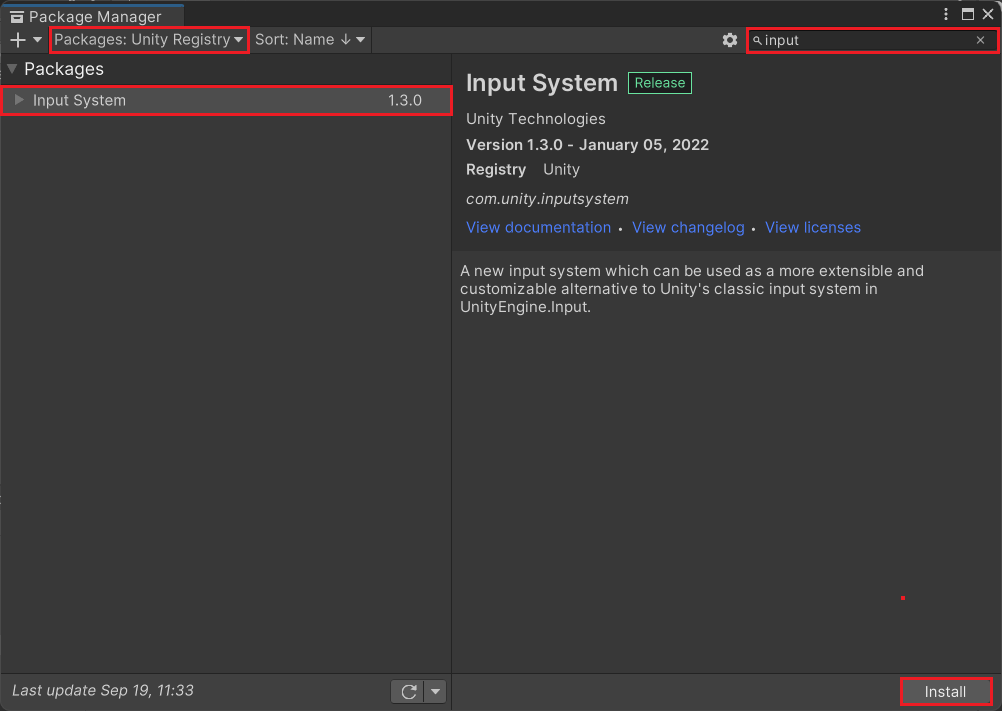
package manager から input system 1.3をinstall。 この際、warningsダイアログが表示されますが、「yes」をclick
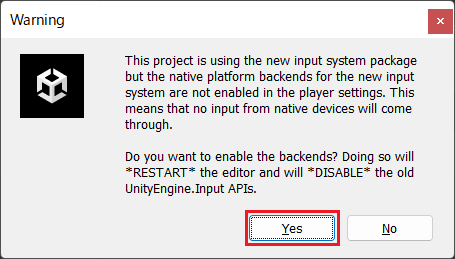
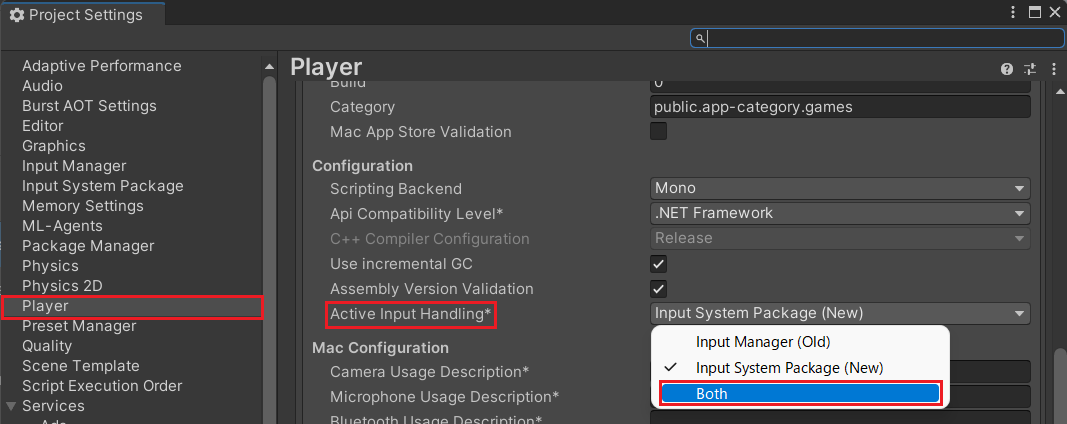
unityを再起動後、player設定から、「active input handling = both」に設定
c:/Users/end0t/MyMlAgents19/Packages/manifest.json を editorで開き、 "com.unity.nuget.newtonsoft-json": "2.0.0" を追加

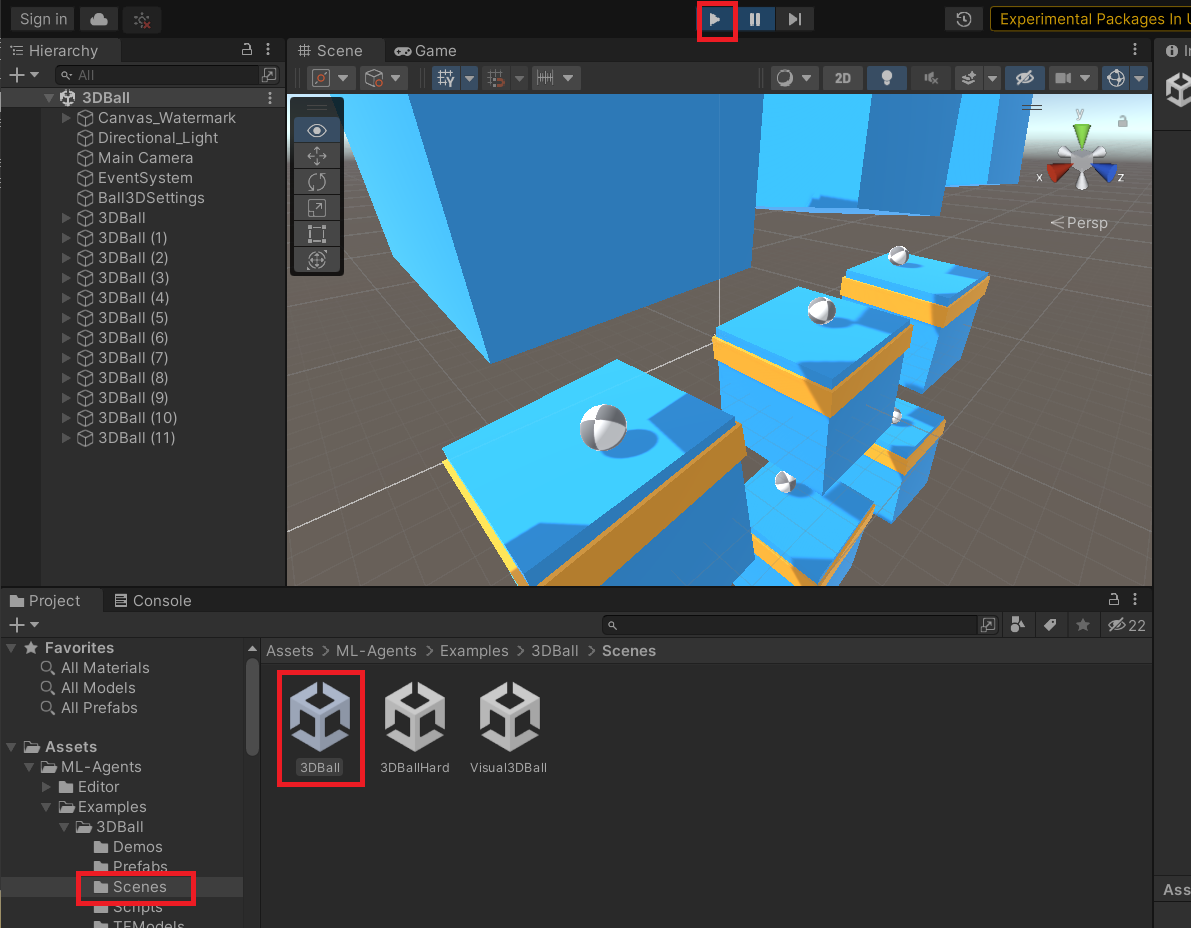
C:\Users\end0t\tmp\ml-agents_19\Project\Assets\ML-Agents のフォルダを Unity の Assets へ、ドラッグすることで コピー

この状態で playボタン(▶)をclickすると、動作を確認できます。
5-2. 学習実行
以下の mlagents-learnコマンドにより results\test3DBall\3DBall.onnx.というfileが作成されます
(ml_agents19) C:\Users\end0t\tmp\ml-agents_19>mlagents-learn .\config\ppo\3DBall.yaml --run-id=test3DBall
C:\Users\end0t\anaconda3\envs\ml_agents19\lib\site-packages\torch\cuda\__init__.py:52: UserWarning: CUDA initialization: CUDA unknown error - this may be due to an incorrectly set up environment, e.g. changing env variable CUDA_VISIBLE_DEVICES after program start. Setting the available devices to be zero. (Triggered internally at  ..\c10\cuda\CUDAFunctions.cpp:115.)
  return torch._C._cuda_getDeviceCount() > 0

            ┐  ╖
      ╓╖╬|╡  ||╬╖╖
    ╓╖╬|||||┘  ╬|||||╬╖
 ╖╬|||||╬╜        ╙╬|||||╖╖                               ╗╗╗
 ╬╬╬╬╖||╦╖        ╖╬||╗╣╣╣╬      ╟╣╣╬    ╟╣╣╣             ╜╜╜  ╟╣╣
 ╬╬╬╬╬╬╬╬╖|╬╖╖╓╬╪|╓╣╣╣╣╣╣╣╬      ╟╣╣╬    ╟╣╣╣ ╒╣╣╖╗╣╣╣╗   ╣╣╣ ╣╣╣╣╣╣ ╟╣╣╖   ╣╣╣
 ╬╬╬╬┐  ╙╬╬╬╬|╓╣╣╣╝╜ ╫╣╣╣╬      ╟╣╣╬    ╟╣╣╣ ╟╣╣╣╙ ╙╣╣╣  ╣╣╣ ╙╟╣╣╜╙  ╫╣╣  ╟╣╣
 ╬╬╬╬┐     ╙╬╬╣╣     ╫╣╣╣╬      ╟╣╣╬    ╟╣╣╣ ╟╣╣╬   ╣╣╣  ╣╣╣  ╟╣╣     ╣╣╣┌╣╣╜
 ╬╬╬╜       ╬╬╣╣      ╙╝╣╣╬      ╙╣╣╣╗╖╓╗╣╣╣╜ ╟╣╣╬   ╣╣╣  ╣╣╣  ╟╣╣╦╓    ╣╣╣╣╣
 ╙   ╓╦╖    ╬╬╣╣   ╓╗╗╖            ╙╝╣╣╣╣╝╜   ╘╝╝╜   ╝╝╝  ╝╝╝   ╙╣╣╣    ╟╣╣╣
   ╩╬╬╬╬╬╬╦╦╬╬╣╣╗╣╣╣╣╣╣╣╝                                             ╫╣╣╣╣
      ╙╬╬╬╬╬╬╬╣╣╣╣╣╣╝╜
          ╙╬╬╬╣╣╣╜
             ╙

 Version information:
  ml-agents: 0.28.0,
  ml-agents-envs: 0.28.0,
  Communicator API: 1.5.0,
  PyTorch: 1.9.1+cu111
C:\Users\end0t\anaconda3\envs\ml_agents19\lib\site-packages\torch\cuda\__init__.py:52: UserWarning: CUDA initialization: CUDA unknown error - this may be due to an incorrectly set up environment, e.g. changing env variable CUDA_VISIBLE_DEVICES after program start. Setting the available devices to be zero. (Triggered internally at  ..\c10\cuda\CUDAFunctions.cpp:115.)
  return torch._C._cuda_getDeviceCount() > 0
[INFO] Listening on port 5004. Start training by pressing the Play button in the Unity Editor.
[INFO] Connected to Unity environment with package version 2.2.1-exp.1 and communication version 1.5.0
[INFO] Connected new brain: 3DBall?team=0
[INFO] Hyperparameters for behavior name 3DBall:
  :      :      :      :
[INFO] 3DBall. Step: 12000. Time Elapsed: 51.622 s. Mean Reward: 1.135. Std of Reward: 0.736. Training.
  :      :      :      :
[INFO] 3DBall. Step: 492000. Time Elapsed: 1344.868 s. Mean Reward: 100.000. Std of Reward: 0.000. Training.
[INFO] Exported results\test3DBall\3DBall\3DBall-499181.onnx
[INFO] Exported results\test3DBall\3DBall\3DBall-500181.onnx
[INFO] Copied results\test3DBall\3DBall\3DBall-500181.onnx to results\test3DBall\3DBall.onnx.

(ml_agents19) C:\Users\end0t\tmp\ml-agents_19>
5-2. tensorboard による学習結果確認
「tensorboard --logdir results」を実行後、 ブラウザで http://localhost:6006/ を開いてください
(ml_agents19) C:\Users\end0t\tmp\ml-agents_19>tensorboard --logdir results
TensorFlow installation not found - running with reduced feature set.
Serving TensorBoard on localhost; to expose to the network, use a proxy or pass --bind_all
TensorBoard 2.10.0 at http://localhost:6006/ (Press CTRL+C to quit)
